I have to confess that I haven't been doing anything special the last few weeks. Amusing a baby has been pretty high on the list. She's 8 months old now, and mobile, which is keeping me on my toes!
I never expected that I would have to fish a tiny human from out beneath my coffee table multiple times a day when I started this adventure. She's currently at my feet, talking to her bouncy chair. I don't know why, since the chair doesn't answer - it just sits there, as chairs are wont to do. Even if the chair did talk, I'm pretty sure it wouldn't understand what "Nabamana!!" means.
That being said, she's now started to communicate to us, which has been lovely. She can wave hello (amusingly, she'll wave hello to the guinea pigs, who just look at her & wait to see if she'll give them some lettuce), raises her arms to indicate she wants up, and she can do the sign for milk when she wants to nurse. I'm hoping the next sign she learns is the one for diaper!
Speaking of the guinea pigs, here's a photo of Princess taking a nap on top of her cuddle sack.
When we adopted the girls, they both had a severe guinea pig mite infestation, but Princess had a worse reaction by far. Half of her hair had fallen out, and she had scratched herself raw. She now has immune-system based spot baldness but is otherwise healthy. I think she looks like a little sheep.
This is her cagemate, Rosie.
Rosie is my cuddle-pig. She's a squishy ball of cuddly fur. She currently has ovarian cysts, but our vet is doing a bang-up job of treating her.
On the baking end of things, I've been doing more lately. I'm semi-regularly making bread, and cookies. This weekend I'm having some people over, and I had a bit of a spree. The thing I'm most excited about is the S'mores Pie*. It was super-easy, and should be delicious!
To make your own S'mores Pie, you need a few simple ingredients.
1 1/4 cup graham cracker crumbs
1/4 cup melted butter or margarine
1 packet chocolate pudding mix
milk to make the pudding (usually 2 cups)
1 to 2 cups whipped cream
mini marshmallows
1. Mix the graham cracker crumbs & melted butter together and then press into a 9" pie pan. Make sure it gets up the sides, as this is your crust.
2. Make the pudding. Fold in the whipped cream and then pour into your graham pie crust.
3. Top with mini marshmallows. Make sure you get a good layer of them on there.
4. Put the pie in the fridge for at least an hour so the chocolate mousse can set. My pie is currently in the fridge overnight.
5. Once the filling has set, put the pie under the broiler of the oven just long enough for the marshmallows to get nice & toasty.
If you wanted to do something less reliant on already partially processed foods, you could make a chocolate custard or a from-scratch chocolate mousse for the filling. You could even go so far as to make your own marshmallows, but that becomes a bit of a multi-day project.
I'm tempted to try this pie again, but to coat the bottom of the pie with a layer of dulche de leche or caramel, just to up the ante a little. What do you think?
* You all know what a s'more is right? Just in case: you toast a marshmallow over a campfire (hoping that you don't set it on fire accidentally), and then sandwich it with a piece of chocolate between two graham crackers and hope you don't burn your tongue when you take your first gooey bite.
Saturday, October 27, 2012
Friday, September 7, 2012
Double Chocolate Mint Brownies
I've been writing about food a lot lately haven't I? I guess it's because I'm a bit of a domestic nerd - I mean, I make my own pickles and jam, bake things from scratch and get really excited about cheese samples.
It's also a lot easier than writing about other issues that have become important to me, but can easily result in an internet troll or flame war. Seriously, some people treat parenting like some bizarre competition, and if you are not doing the same things they are, you are, apparently, cheating.
There are a lot of bloggers who have been at it a lot longer than I have, and seem to have a good handle on the controversial stuff. I think I'll leave it to them.
Instead, I'd like to talk to you about brownies. Delicious double chocolate brownies. With mint. Delicious minty double chocolate brownies. My house currently smells of them and it's all I can do to keep from devouring the whole pan.
They are also insanely easy. Start with the base Baker's Choclate One-Bowl Brownies recipe:
You will need:
4 squares (ounces) of unsweetened chocolate
3/4 cup of butter
2 cups sugar
3 eggs
1 tsp vanilla
1 cup flour
Instead of the optional nuts in the original recipe, you will need 1 entire bag of chocolate chips (350g bag if you are in a country that uses the metric system).
You will also need 1/4 tsp mint essence
Melt the butter & chocolate squares together. I usually do this in the microwave - it takes 1-2 minutes.
Once melted, add the sugar and stir until well blended.
Add the vanilla, mint, and eggs. I usually add the eggs one at a time. I find it makes things a little airier.
Then, stir in the flour. Once the flour has been incorporated, add the chocolate chips.
Pour into your greased cake pan,and bake for 30-35 minutes in a 350F oven.
I recommend under-baking them slightly, so that they'll remain more moist. Theoretically, this makes 24 brownies. In my house, it usually makes 6-12 depending on how many I eat right out of the pan and how generously I cut them.
Now that my house smells of minty chocolate goodness, this will hopefully be motivation for me to get some more of my preserving done this coming weekend.
If you're sick of food-related posts, maybe next time I'll tell you about the four-legged creatures that live in my house.
* If it's near the holiday season, when they are mostly cooked, but the top hasn't set yet, you can sprinkle them with 1/2 cup to 1 cup of crushed candy canes for extra minty goodness.
It's also a lot easier than writing about other issues that have become important to me, but can easily result in an internet troll or flame war. Seriously, some people treat parenting like some bizarre competition, and if you are not doing the same things they are, you are, apparently, cheating.
There are a lot of bloggers who have been at it a lot longer than I have, and seem to have a good handle on the controversial stuff. I think I'll leave it to them.
Instead, I'd like to talk to you about brownies. Delicious double chocolate brownies. With mint. Delicious minty double chocolate brownies. My house currently smells of them and it's all I can do to keep from devouring the whole pan.
They are also insanely easy. Start with the base Baker's Choclate One-Bowl Brownies recipe:
You will need:
4 squares (ounces) of unsweetened chocolate
3/4 cup of butter
2 cups sugar
3 eggs
1 tsp vanilla
1 cup flour
Instead of the optional nuts in the original recipe, you will need 1 entire bag of chocolate chips (350g bag if you are in a country that uses the metric system).
You will also need 1/4 tsp mint essence
Melt the butter & chocolate squares together. I usually do this in the microwave - it takes 1-2 minutes.
Once melted, add the sugar and stir until well blended.
Add the vanilla, mint, and eggs. I usually add the eggs one at a time. I find it makes things a little airier.
Then, stir in the flour. Once the flour has been incorporated, add the chocolate chips.
Pour into your greased cake pan,and bake for 30-35 minutes in a 350F oven.
I recommend under-baking them slightly, so that they'll remain more moist. Theoretically, this makes 24 brownies. In my house, it usually makes 6-12 depending on how many I eat right out of the pan and how generously I cut them.
Now that my house smells of minty chocolate goodness, this will hopefully be motivation for me to get some more of my preserving done this coming weekend.
If you're sick of food-related posts, maybe next time I'll tell you about the four-legged creatures that live in my house.
* If it's near the holiday season, when they are mostly cooked, but the top hasn't set yet, you can sprinkle them with 1/2 cup to 1 cup of crushed candy canes for extra minty goodness.
Monday, September 3, 2012
Canning Fool
If you were smarter/less busy than I this past spring and planted a garden, you should have been faced with abundance the past month or so. Since the weather has been so mild here in Southern Ontario, you are probably still in the midst of abundance.
Abundance, to me, also equals preserving some of it for later enjoyment.
Since I was not really in any position to get a garden going this past spring, I'm mostly relying on farmer's market/local produce from the grocery store to get my preserves restocked. Due to the munchkin, I'm doing it sort of piecemeal, since I need to have someone else on hand to watch her. I also need to plan it around her feeding schedule since I'm nursing.
Yesterday I managed to get some Red Onion Jelly and some Garlic & Sweet Pepper Jelly made in one afternoon! This is in addition to the Peach-Blueberry freezer jam, Zesty Dill Pickle Slices and Ginger Carrot & Daikon pickles I've already made.
I don't have any photos of the pickles, but here's some photographic evidence of the jellies!
The Red Onion Jelly comes out in a lovely pink hue.
You can sort of see the flecks of red pepper of the garlic jelly in the above photo.
My two favourite sources for water-bath canning (the kind for which you don't need any special equipment) are the Bernardin cookbooks and a book I picked up called The Complete Book of Small Batch Preserving.
Canning is one of those food-related things where I generally follow a recipe fairly closely, since there is a risk of food poisoning if it goes wrong.
Still on the preserving list for me:
Abundance, to me, also equals preserving some of it for later enjoyment.
Since I was not really in any position to get a garden going this past spring, I'm mostly relying on farmer's market/local produce from the grocery store to get my preserves restocked. Due to the munchkin, I'm doing it sort of piecemeal, since I need to have someone else on hand to watch her. I also need to plan it around her feeding schedule since I'm nursing.
Yesterday I managed to get some Red Onion Jelly and some Garlic & Sweet Pepper Jelly made in one afternoon! This is in addition to the Peach-Blueberry freezer jam, Zesty Dill Pickle Slices and Ginger Carrot & Daikon pickles I've already made.
I don't have any photos of the pickles, but here's some photographic evidence of the jellies!
The Red Onion Jelly comes out in a lovely pink hue.
You can sort of see the flecks of red pepper of the garlic jelly in the above photo.
My two favourite sources for water-bath canning (the kind for which you don't need any special equipment) are the Bernardin cookbooks and a book I picked up called The Complete Book of Small Batch Preserving.
Canning is one of those food-related things where I generally follow a recipe fairly closely, since there is a risk of food poisoning if it goes wrong.
Still on the preserving list for me:
- Strawberry Jam (from berries I stashed in the freezer last summer during first trimester pregnancy nausea)
- Salsa (I use a recipe from the Small Batch book for this, but replace parsley with cilantro in my version)
- Plum sauce (I haven't actually made plum sauce before, so I'm still deciding on a base recipe. If you have a favourite, please let me know!)
- Ketchup (maybe. If tomatoes are a good price, and I don't get distracted)
Friday, August 17, 2012
Glorious Peaches
Peaches are in season here. I love peaches. They are one of my favourite fruits. I generally only eat them when they are in season - tinned just isn't the same. My partner doesn't like them, which means that I can buy & devour a whole basket of them without having to share.
That is, I didn't have to share until recently. It turns out, the kiddo, who is just shy of 6 months as of this writing, really likes peaches. The other day, I bit into a peach, and she grabbed my arm, yanked it down to her face level and faceplanted onto the fruit. She then preceded to suck out the juice from where I had just bitten. She insisted that I share the rest of the peach with her via baby-death-grip on my wrist.
I think she's ready to start solids.
In an attempt to preserve some of the delicious peachiness for myself, I made some peach-blueberry freezer jam. Freezer jam is the best! All you need is mashed fruit, sugar and freezer jam pectin. No stove required - which is fantastic on hot days. The downside is that you can't store the jars on a shelf - as the name implies, it is best stored in the freezer. It also tends to be a little bit runnier than other jams, but depending on how you are planning on using the jam, I find that's generally not an issue.
I've already eaten half a jar, stirred into my morning oatmeal. I wouldn't be surprised if I turn into a peach before the summer is out!
Wednesday, August 1, 2012
Bread Heels & Baby Feeding
I've never understood why small children & babies dislike having their faces wiped so much.
I can understand why they don't want you messing with their nose - after all, how would you feel if someone tried to pick your nose?
But on the faces front, I don't get it. I would feel better after having sticky crud removed from my chin.
I've been ruminating on this topic lately as we will soon be faced with introducing solids to the munchkin. This, of course, will necessitate much face wiping.
We've purchased a high chair, and have been sitting her in it with a spoon & some toys at meal times. So far, she seems to like it.
As for the idea of actually getting food into her face, well, frankly, I'm a bit frightened. I also don't want to have to spend ages every week making purees.
This has brought me to research baby-led weaning (ie. minimizing the purees and just giving your kid actual food). You can see how this approach is appealing from a time saving standpoint. Just make sure there's some veggies/meat/etc appropriately cooked through, and in a form easy for the kid to grasp, and let them have at it (with supervision of course).
Anecdotally, babies fed this way seem to be less likely to become picky eaters. Since my partner & I enjoy trying different cuisines, this also seems awesome to us. I like the idea of being able to cook whatever & have her eat at least part of it.
Speaking of cooking whatever, last night I made a Greek-inspired strata. I don't like eating the heels of bread loaves, but I also dislike wasting food. So, I usually put them in the freezer until I have a bunch, and then I make a strata. It is a convenient way to use up stale or leftover bread.
You will need:
a 2 quart casserole dish (greased)
5-6 cups diced, stale or toasted bread (about 10 pieces of a standard store-bought loaf)
2 cups milk
4 eggs
veggies, cheese, spices, etc to throw in. The version I did last night had:
1/2 one large cooking onion, diced
8 quartered cherry tomatoes
1/2 packet of frozen spinach, thawed & squeezed to get rid of the extra liquid
lots of feta cheese
some sliced mushrooms because they needed to be used up
oregano, thyme & pepper
Toss the onion, tomatoes, mushrooms & spices in your casserole (Hey! I remembered to take pictures!).
Add your spinach and cheese
Then add your bread cubes. Beat your eggs & the milk together, and pour over top.
Then, stir everything up in the dish so it is well mixed. Put it in the oven, uncovered, at about 325-350F and bake for 45 minutes to 1 hour.
The bread will soak up the egg & milk mixture, and everything will get all puffy & chewy & wonderful. If you like, before you put it into the oven, you can sprinkle the top with breadcrumbs or Parmesan. Then the top will come out all crunchy & delicious.
The best thing about strata is that you can adapt it to any flavour profile you like. Having people over for brunch? Fill it with cheddar, diced bell pepper, onion and diced potatoes (and if you like meatiness, you could also add bacon or breakfast sausages). Fancy dinner? Fill it with Gruyere & asparagus & mushrooms.
Hopefully, baby will be able & willing to enjoy strata when I make it next.
I can understand why they don't want you messing with their nose - after all, how would you feel if someone tried to pick your nose?
But on the faces front, I don't get it. I would feel better after having sticky crud removed from my chin.
I've been ruminating on this topic lately as we will soon be faced with introducing solids to the munchkin. This, of course, will necessitate much face wiping.
We've purchased a high chair, and have been sitting her in it with a spoon & some toys at meal times. So far, she seems to like it.
As for the idea of actually getting food into her face, well, frankly, I'm a bit frightened. I also don't want to have to spend ages every week making purees.
This has brought me to research baby-led weaning (ie. minimizing the purees and just giving your kid actual food). You can see how this approach is appealing from a time saving standpoint. Just make sure there's some veggies/meat/etc appropriately cooked through, and in a form easy for the kid to grasp, and let them have at it (with supervision of course).
Anecdotally, babies fed this way seem to be less likely to become picky eaters. Since my partner & I enjoy trying different cuisines, this also seems awesome to us. I like the idea of being able to cook whatever & have her eat at least part of it.
Speaking of cooking whatever, last night I made a Greek-inspired strata. I don't like eating the heels of bread loaves, but I also dislike wasting food. So, I usually put them in the freezer until I have a bunch, and then I make a strata. It is a convenient way to use up stale or leftover bread.
You will need:
a 2 quart casserole dish (greased)
5-6 cups diced, stale or toasted bread (about 10 pieces of a standard store-bought loaf)
2 cups milk
4 eggs
veggies, cheese, spices, etc to throw in. The version I did last night had:
1/2 one large cooking onion, diced
8 quartered cherry tomatoes
1/2 packet of frozen spinach, thawed & squeezed to get rid of the extra liquid
lots of feta cheese
some sliced mushrooms because they needed to be used up
oregano, thyme & pepper
Toss the onion, tomatoes, mushrooms & spices in your casserole (Hey! I remembered to take pictures!).
Add your spinach and cheese
Then add your bread cubes. Beat your eggs & the milk together, and pour over top.
Then, stir everything up in the dish so it is well mixed. Put it in the oven, uncovered, at about 325-350F and bake for 45 minutes to 1 hour.
The bread will soak up the egg & milk mixture, and everything will get all puffy & chewy & wonderful. If you like, before you put it into the oven, you can sprinkle the top with breadcrumbs or Parmesan. Then the top will come out all crunchy & delicious.
The best thing about strata is that you can adapt it to any flavour profile you like. Having people over for brunch? Fill it with cheddar, diced bell pepper, onion and diced potatoes (and if you like meatiness, you could also add bacon or breakfast sausages). Fancy dinner? Fill it with Gruyere & asparagus & mushrooms.
Hopefully, baby will be able & willing to enjoy strata when I make it next.
Tuesday, July 24, 2012
Take One Banana . . .
Human beings love to give advice. It seems to be an innate trait in our species. It really comes out when people see you with a new baby. In this situation it is also 95% unsolicited, often from complete strangers.
Here's the thing, the science & knowledge behind child development is constantly evolving. What was recommended when I was a baby is vastly different from what is now often recommended.
It used to be commonly recommended that babies be put to sleep on their tummies. We now know that this increases the risk of SIDS, so babies should be put to sleep on their backs.
There are also about a million ways to raise children. This is important because babies/children are individuals. They have their own quirks and needs, that may be different from another babies quirks and needs. In other words, what works for one family, may not work for another family.
I admit that I've gone a little granola in my parenting choices so far. I'm exclusively breastfeeding on demand. We co-sleep. I wear my baby in a wrap or sling when we go out most of the time. We're using cloth diapers (and holy shamoly are modern cloth diapers freaking adorable! Look at this! ). I'm researching baby-led weaning.
You may think I'm turning into a cuckoo-hippy-crazy-lady. However, my child is happy, growing well, and meeting her developmental milestones. In other words, this is clearly working for our family (for now at least - babies are tricky creatures and will change it up on you without a moment's notice!).
When I'm out & about with my kid, and she's smiling and enjoying the world, don't tell me what a 'good baby' she is, and then proceed to tell me everything I'm doing wrong. Same when she's tired & cranky. Maybe she's been cranky all day due to teething, and I'm taking us both for a walk in order to maintain my sanity.
In any event, after unsolicited advice has hit me in my confidence as a parent, here's a little treat that I make for myself. It has fruit and protein and chocolate, so I can also pretend there's some healthiness in there.
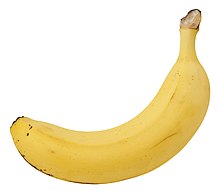
Take one banana.
Peel the banana, and break it in half (or thirds, or quarters) and put the pieces in a bowl.
Spread the top of the banana pieces with peanut butter (or whatever nut butter you have in the house - I've also used almond butter to great success).
Cover with chocolate sauce (I usually use the kind you use to make chocolate milk).
Eat.
It's like taking a homemade peanut butter cup and making it even better. An added bonus for the summer months is that it requires zero use of any heat generating appliances.
I hope it makes you feel better too.
Friday, July 13, 2012
Vegetable Stroganoff
How are enjoying your summer so far? Despite the heat, ours is going pretty well. Turns out the kiddo loves water! Thank goodness my mom bought us a kiddie pool!
Last night, the baby was being cooperative, so I made dinner before my partner came home (she's usually hungry/needy around the time I would normally need to start dinner in order to have it ready for my partner's usual arrival time).
We had Vegetable Stroganoff. I don't think I make this often enough. Here's how you can make it for yourself (sans pictures, sorry).
Ingredients:
Noodles (egg noodles are traditional, but I find any noodle will do. Last night I used bowtie pasta)
1 cube of vegetable or mushroom bouillion
1 heaping tbsp flour
sour cream
water
butter or margarine
1 small onion, diced
1 clove garlic, minced
an assortment of veggies, that in my opinion must include mushrooms. Last night, I used about 7 button mushrooms, a carrot, broccoli and frozen green beans.
Put a pot of water on for the noodles. At the same time, melt the butter in a frying pan and toss in the onions.
When the onion has softened, add the garlic to the pan. When the onion & garlic has started to caramelize, you can begin adding your other veggies, starting with those that will take longest to cook.
In the meantime, mix together your bouillion cube, the flour and at least a half cup of sour cream. Add pepper to taste, and then thin it out with a quarter to a half cup of water and make sure it is well mixed.
If your veggies are mostly cooked, add the sauce to the frying pan, stirring well and being sure to scrape the delicious caramelized goodness from the bottom of the pan. The sauce will thicken and reduce fairly quickly. Add water if you want it runnier.
Add the noodles and toss everything together and then enjoy!
I hope you like it!
Last night, the baby was being cooperative, so I made dinner before my partner came home (she's usually hungry/needy around the time I would normally need to start dinner in order to have it ready for my partner's usual arrival time).
We had Vegetable Stroganoff. I don't think I make this often enough. Here's how you can make it for yourself (sans pictures, sorry).
Ingredients:
Noodles (egg noodles are traditional, but I find any noodle will do. Last night I used bowtie pasta)
1 cube of vegetable or mushroom bouillion
1 heaping tbsp flour
sour cream
water
butter or margarine
1 small onion, diced
1 clove garlic, minced
an assortment of veggies, that in my opinion must include mushrooms. Last night, I used about 7 button mushrooms, a carrot, broccoli and frozen green beans.
Put a pot of water on for the noodles. At the same time, melt the butter in a frying pan and toss in the onions.
When the onion has softened, add the garlic to the pan. When the onion & garlic has started to caramelize, you can begin adding your other veggies, starting with those that will take longest to cook.
In the meantime, mix together your bouillion cube, the flour and at least a half cup of sour cream. Add pepper to taste, and then thin it out with a quarter to a half cup of water and make sure it is well mixed.
If your veggies are mostly cooked, add the sauce to the frying pan, stirring well and being sure to scrape the delicious caramelized goodness from the bottom of the pan. The sauce will thicken and reduce fairly quickly. Add water if you want it runnier.
Add the noodles and toss everything together and then enjoy!
I hope you like it!
Subscribe to:
Posts (Atom)